Knit to the Point

How to Wrap and Turn in Knitting

You’ve reached the dreaded short rows section of your knitting pattern and it calls for a wrap and turn. What is the purpose of short rows? Short rows are typically used for knitting garments such as tops and sweaters. Knitting back and forth adds fabric to the back shoulders of your garment. Short rows can be used in other areas of patters as well, to add that extra fabric wherever needed.

Are short rows really necessary?

Alaska Sweater available on Ravelry

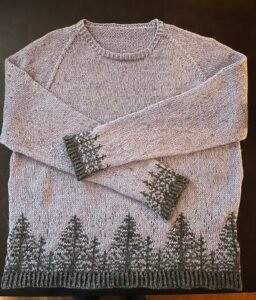
The extra fabric added to the back shoulders raises the neckline so that it lays nicely against the back of your neck and makes the front of the neckline lie a bit lower. This keeps the collar from feeling like it is choking you. There is no rule that says you must add short rows, but the garment will be more comfortable to wear. You can see in the example here of the Curdagh Cardigan that the shortTherefore, it’s a valuable skill to add to your knitting bag of tricks. There are a few ways to do it, such as the wrap & turn method or German short rows. In many cases you can use whichever method you prefer. Some patterns don’t even specify which to use, so it can be up to you.  

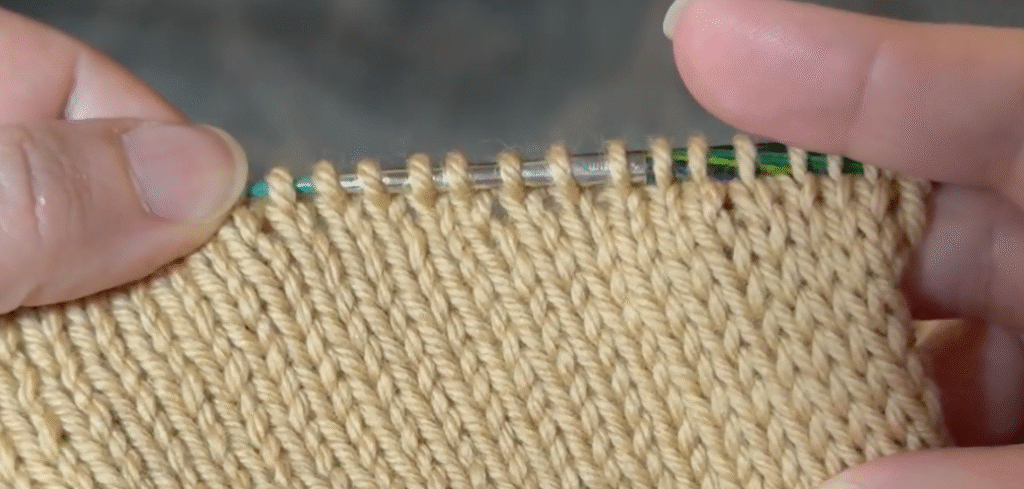
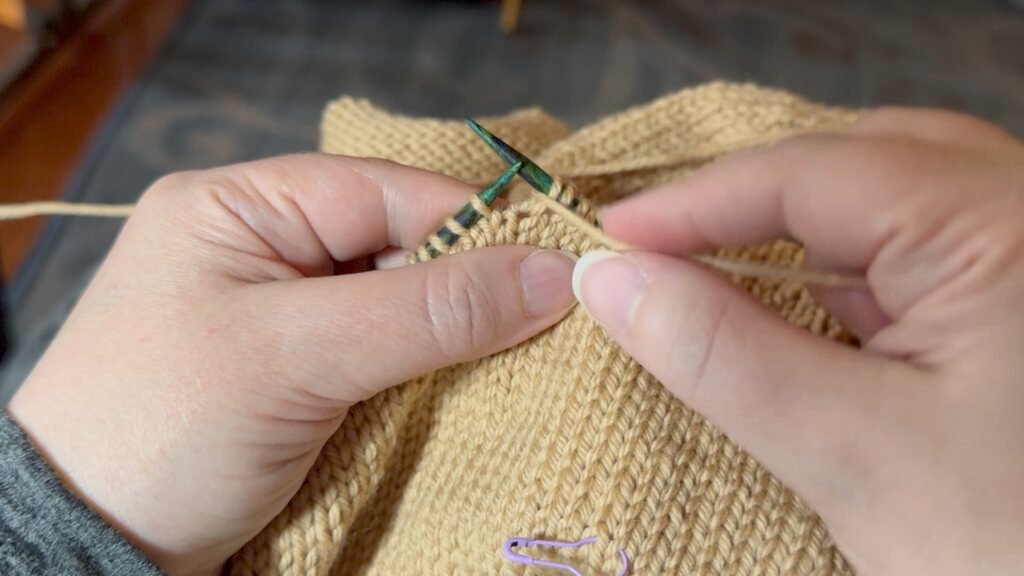
The Wrap and Turn method of creating short rows is actually my favorite as it is super simple once you get the hang of it. I usually leave a removable stick marker where I make the wrap, just to make it easier to spot the wrap when I come back around. 

Steps for the Wrap & Turn

  1. Slip the stitch (purlwise) from the left-hand needle on to the right. 
  2. Wrap your yarn around the stitch.
  3. Place the wrapped stitch back on the left-hand needle
  4. Place your yarn in the back and turn your work.
  5. You can now knit (or purl, depending on which side you’re on) in the other direction until you reach the point at which your pattern says to wrap and turn again,.

Patterns will typically include several short rows in a repeating pattern. Larger sizes will need more short rows to build up enough fabric. Depending on whether you are knitting the garment from top to bottom or bottom up, you may need to knit past your previous row’s wrap before you can turn again. You could simply knit that wrapped stitch as usual, but the wrap will then be visible in your finished work. Therefore it is recommended that you “pick up” those wraps as you knit the wrapped stitch. 

Picking Up Your Wraps

Depending on which direction you’re knitting your garment, you may pick up the wraps either as you go, or once you’ve completed all of your short rows. You could leave them as-is, but in many cases they will be noticeable.

On the knit side, you can either pick up that wrap with your right hand needle and place it on the left hand needle before knitting them together, or more simply you can pick up that wrap and immediately knit into both the wrap and the next stitch. On the purl side, it is a bit easier to pick up that wrap and place it on the left hand needle first, then purl the wrap and the next stitch together. Below is a quick video demonstration on how you pick up those wraps. 

As you can see from this example, once those wraps are picked up, they are barely visible on the right side of the work. 

Knit side with picked up wraps

Leave a Comment

Your email address will not be published. Required fields are marked *